
Castle


In a new document, insert new layer folders so you have 6 of them.
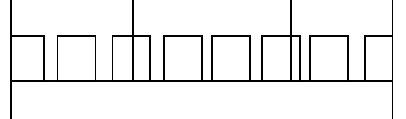
Layer 1: walls
Make your canvas 600x600.
In "Layer 1" folder, draw three rectangles, two for the towers and one for the main wall.

Draw a smaller rectangle for the third tower, a bit taller than the others.

Using the Rectangle tool, add some posts to the wall.
Rename "Layer 1" as "Walls" (double-click on the layer name).
Layer 2: Roofs
Rename "Layer 2" as "Roofs". In this layer folder, draw triangles for the tops of the towers. To draw the triangle, you have 3 options:
- Rectangle tool (and delete a corner),
- Polygon (3 sides), or
- Pen tool (click the 3 points, adjust with white arrow).
Make sure the width of the bottom matches the width of the rectangle.

LAYER 3: Flags
Rename "Layer 3" to "Flags".
Draw a tower flag. First draw a flag pole using the Line tool.

FLAG: draw the flag using either
- the Pen tool (make sure you've clicked off the flag pole line), or
- the Polygon tool (8 sides)

Zoom in and adjust the points to resemble a flag using the white arrow tool.

LAYER 4: Windows
- Rename "Layer 4" to "Windows".
- Draw a triangle for the windows.
- Select the layer. Then with the Pen tool, click and drag the top point to create the curved arch of the window.


Layer 5: Gate
There are 2 ways to draw the gate:
Option #1 (easiest): draw a rectangle, then ungroup it (Modify>Ungroup or CTRL+SHIFT+G). With the Pen tool, click and drag a little on the top corner points. This is much easier/simpler.
Option #2 (trickier): a rounded rectangle and straightening the bottom parts (using ALT and the white arrow tool). This can be tricky to get the bottom lined up though.

Add some lines to the gate for the wood. Go to the fill properties, pick a grey or brown color, and add the Texture "vertical lines" to the gate.

LAYER 6: Bricks
Rename "Layer 6" as "Bricks".
Add some bricks to the walls using the Rectangle tool. Create a group of 3 bricks.

Fill them now (or later) with a color/texture/gradient.
Select them and copy them for the other places so they're all the same size.

Colors & Background
- Change all the shapes in one layer folder at the same time, by clicking on the layer folder name, then changing the color fill in Properties.
- Add a Linear Gradient to each of the towers and roofs, all in the same direction (where the light is hitting it). Select each shape and change the fill in the Properties panel. Pick 2 shades of the same color.
- You can select all the walls at the same time - then set the gradient fill so you only have to do it once.

In a new layer folder, add 2 rectangles - fill with colors, then choose a Texture you like. Make sure they don't have a stroke. Move them behind all the other layer folders.
- Grass
- Sky

More examples...


